From the Kitchen: Blueberry Cake

Hello Everyone! It's Lauren, and today I'm coming from the kitchen with a lovely recipe for you. With the 4th of July right around the corner, I thought I'd share this yummy cake that looks rather patriotic {Although baking is always a good idea...even if it's not a holiday :)} 

Delicious Blueberries...a sign of summer
 Here it is just before it went into the oven!
Time for the frosting!

 Sprinkle with blueberries
Garnish with the juiciest strawberries you can find... and Voilà! 


Blueberry Cake
makes one 9" round cake 
{Here's another idea if you are feeling very adventurous and patriotic: Make the cake in a rectangle and then garnish with strawberries and blueberries in a flag pattern to make your own flag cake!}

1 1/2 cups organic white flour
*sub with other flours if desired
3/4 cup sugar, organic
1 Tbsp baking powder
pinch of salt
3 Tbsp butter, softened
1/2 tsp almond extract (sub with vanilla if desired)
3 Tbsp rolled oats
2 Tbsp flax seeds + 2/3 cup warm water
1/3 cup almond milk, vanilla (or soy)
1/4 cup applesauce, unsweetened
3 Tbsp orange juice + pinch orange zest(opt.) (fresh squeeze room temperature oranges - or warm OJ to about room temp)
optional: 1/2 tsp cinnamon

fold -ins:
1/2 cup blueberries
1/2 cup chopped walnuts (or almonds) (or a mix of both!)

topping: blueberries +pinch rolled oats + sprinkle of almonds

note: I used about 10 ounces blueberries total - buy 2 6oz packs and eat any leftovers :)

Frosting:
1/3 cup butter, softened
2/3 cup virgin coconut oil (or cream cheese)
3 cups powdered sugar* (or 1 cup see note)
pinch salt

*{I found the sugar amount in the frosting to be way too much so I used cream cheese (instead of coconut oil) and 1 cup or so of powdered sugar...play around with the flavor until you reach your desired taste!}


Directions:

1. Preheat oven to 350 degrees.

2. Add flour, baking powder, salt, sugar, oats and optional cinnamon to a large mixing bowl. Toss a bit.

3. In a small dish, combine the water and flax seeds. Stir briskly and let sit for about 2-4 minutes.

4. Add the water/flax mixture, orange juice, applesauce, extract and soy milk. Tip: try to make sure these ingredients are either room temperature or slightly warmed. I used room temperature oranges to fresh squeeze - and room temp applesauce. This will help your batter blend more seamlessly - and the butter will stay smooth.

5. Stir your batter by hand until smooth. Fold in the blueberries and chopped nuts.

6. Pour your batter into your cake dish - grease and flour the sides before pouring.

7. Bake at 350 degrees for about 25-30 minutes - or until edges begin to brown a bit. Remove from oven to cool.

8. Start your frosting about 20 minutes before you want to frost your cake. Your cake must be cooled when you frost it or the frosting will melt.

9. Add frosting ingredients to mixing bowl and blend with hand beater mixer until fluffy and smooth. Add in a splash of room temperature soy milk or coconut milk or almond if needed to thin out the blend. Place frosting in fridge for just about five minutes before frosting. Any longer and the frosting will get too firm.

10. Frost cake and add blueberries (and strawberries) on top. Serve with softened frosting. Store in fridge - but allow frosting to soften a bit before re-serving from fridge.

Enjoy!


9

DIY: Cute and Colorful Inspiration Board

Hey Friends,

I'm so glad and grateful to be filling in for the lovely Candice. Teatime Thoughts was the very first blog I read that inspired me to begin blogging because I was touched by it. So it's so awesome that I'm filling in!!

Summer inspires me in so many ways, I'm sure many of you can relate. Summer marks the intro to new adventures and unforgettable memories. What better time to jump start on some fun & super creative projects?! This project is ultra easy create and with a trip to your local arts & craft store you're all set and ready to let the creativity roll! This would be a great gift and can be hung just about anywhere in the house/office.

Here are the items you'll need:


Frame with Backing/Hanging Piece
Spray Paint (Optional)
Staple Gun
Fabric
Fabric Scissors
Glue Gun (Optional)


First, measure the cork and the fabric. Be sure to leave extra fabric so when it's time to staple it you won't be short on fabric. Should you have excess fabric you can simply cut it off.

After measuring your fabric and cork. It's time to snip away. Evenly, cut the fabric and begin to fold the ends in preparation to staple gun it.

Ok be very careful with this. I underestimated this light weight gun I bought from A.C. Moore. It packs a powerful punch.
Make sure your feet and eyes are not in close range, sounds sort of impossible but you get the idea. Tip: You can use boutonniere pins to hold the fabric in place before stapling. 

There you have it! It looks wonderful- not quite yet...Snap your fabric and cork into the frame and voila a masterpiece
has been made by you! 

I sprayed my frame Aqua Blue outside in the yard. Be sure to do it on the grass so you won't stain concrete or wooden areas as I did. =)


I hung mine near my vanity station.


I hope you enjoyed my little DIY project. Stop my blog- I would love to hear from you! Plus your  ideas on other easy to do DIY projects. Visit trulyrachel.blogspot.com

Truly,

Rachel 
xoxo

8

Endless Summer: Week 2 :: Summertime DIY

Hi Everyone!
Welcome to Week 2 of the Endless Summer series! Hope you all enjoyed the Beach Beauty tips last week. Big thanks to Dulce for all her fabulous tips and tricks for making summer beauty a breeze! This week we're talking crafts and other fun DIY ideas. I love finding fun things that I can make myself; it is so much fun to be a little creative rather than just buying it at a store. 

To kick things off, I'm going to share a few of my favorite DIY ideas as of late (I have a running pinterest board list of things I want to try, and summer is the perfect time to cross a few things off it! :)

These cute plates would be adorable to eat off of, especially if you made a set! (perfect wedding gift too!)

How fun would this garland be at your next party??! In multiple colors too!

I'm loving this Pretty package wrapping  

Do you have any fun DIY ideas to share?? Leave them in the comments below! 
Stay tuned for some fun crafts and things ahead this week!

Here's to a great week ahead!
-Candice

4

My 5 Favorite Summer Essentials

Hi Everyone! I hope you've been enjoying Beach Beauty week so far! 
When Summer arrives, I'm not one to pile on the products. It's far too hot to wear much makeup, and I want my routine to be as simple and easy as possible. Here's my tried and true favorites that make getting ready a breeze!
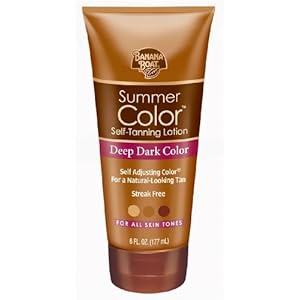
I am absolutely in love with this product. Not only does it give you a great, believable color in a very quick amount of time, it's great for blending in any unsightly tan lines caused from swimsuits (high-waisted suits, anyone?) I like to smooth a little of this onto my arms and legs after showering, and within an hour it looks as though I've just come back from the beach. Definitely something I'd pack in my suitcase for vacation, especially if you're going to be flaunting flirty skirts and swingy summer dresses. 
As much as I love a good sunkissed look, I'm definitely not into the damage and wrinkles it causes later, so instead of letting my face absorb too much sun, I fake a bronzed glow on my face with some bronzer. (your face will thank you later!) Sweep this across your cheekbones, along your jawline, and top corners of your face by the hairline, as well as a little on your chin and sides of your nose. Be cautious to do this lightly as you want to avoid looking like you fell into the mud or find yourself mistaken as the lost member of the Jersey Shore cast (yikes!). 
Sheer color is the perfect compliment to a summer tan, and can make your teeth look whiter too (especially if you pick a shade with a blue undertone). Feeling a little tired? A bright punch of color, in a sheer wash, of course, is a simple refresher. These balm stains go on super smoothly and add just enough lasting color; their small size makes it perfect for tossing in a carry-on or beach bag! 
Being such a fan of summer-y scents like coconut, fruit and the like, I am loving Bath and Body Works' new Malibu Heat collection. The scent is very beachy and reminds me of everything I love about summer. The fragrance mist is really nice, and a little splash of it before you head out to brunch or a beach day will put you in a summer state of mind! I'm taking mine on vacay with me for sure!!

5. Striped Dress
A striped dress is truly a classic summer look; it's simple enough to throw on with a cute pair of sandals for running errands, catching up with friends over lunch, shopping in the market or as a chic cover up, poolside. Dressed up or down, you'll be chic and comfy. I've got this version, and this one is rather cute as well!

Hope you enjoy these simple ideas for looking fresh, glowing and pretty!
-Candice
11

7 Tips to A Beautiful Summer

Hello! It's Dulce again from The Dulce Taylor Blog and today I'm bringing you 7 Tips for a Beautiful Summer! Let's get started shall we...


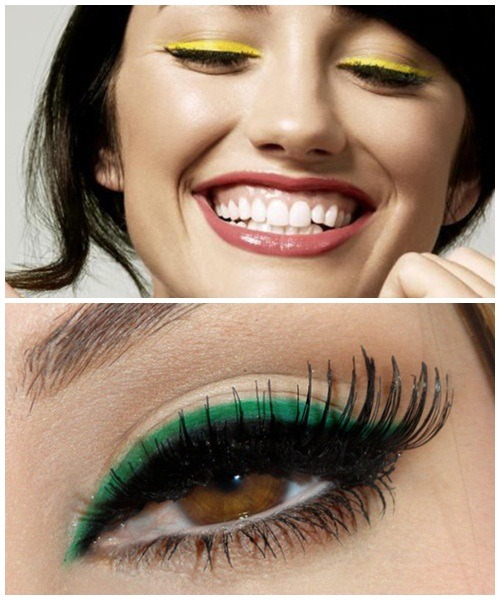
1. Make-up :: It is my personal opinion that summer is a time when we shouldn't wear a ton of make-up. I hate seeing a girl with sweaty globs of make-up running down her face in the middle of July. Instead of painting on thick layers of make-up this summer, show off your natural tan. Focus more on your eyes or your lips. Choose an eyeshadow or eyeliner that looks great with your eye color and make those babies pop! Or, you can do a softer eye and experiment with a bright pink lipstick. Have with it! Break away from your norm...


2. Sunscreen :: Always, always wear sunscreen if you are going to be out in the sun for a long period of time. Because burns just aren't pretty, and neither is peeling. But don't let that keep you out of the sun! Vitamin D is super good for you, and you can easily get some by being in the sun for at least a few minutes everyday. 


3. Swimwear :: Invest in a swimsuit you love! You will feel so much more beautiful and attractive if you feel great in what you're wearing. Also, think about the tan lines your swimsuit will give you. Anything with awkward lines might not look good later in certain clothes. Just think about that before you buy one...


4. Natural Hair :: Like your make-up, your hair should look effortless and carefree. Find a good beach wave hair spray to give your hair that natural, wavy look.


5. Casual Wear :: Summer is the time to wear less clothes. Keep it simple with a patterned tunic, or a simple dress, or even a great pair of white shorts. I think summer is the perfect time of year to experiment with color. Throw a bright colored shirt on with a pair of classic denim jeans. Or wear a bright colored dress with gold shoes and accessories. Just keep it simple. If your outfit looks too put together, you lose the relaxed, summer-y effect. 


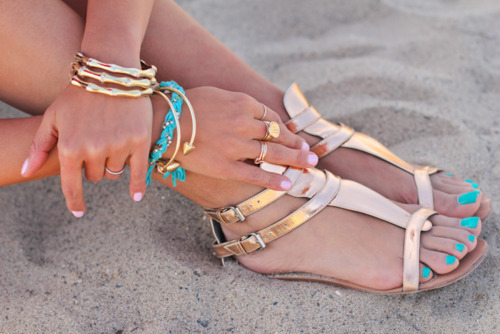
6. Accessorize :: While your outfit should be simple, your accessories should really stand out. Wear bangles on your wrist, or drape a bright colored scarf over your neck. Get a colorful bag that looks great with everything. And, of course, invest in a pair of sunglasses that look great on your face. Accessories can make the outfit, especially in the summer. Wear them wisely.


All pictures via Pinterest

7. Smile :: Nothing will make you more beautiful than a smile! It's summer! The sun is high in the sky and the weather is wonderful! You should never stop smiling. (Also, white teeth look great on a tan face...whitening strips are always a good idea!)

I hope you enjoyed these little tips! To read more from me, visit The Dulce Taylor Blog.


6

Wordless Wednesday

6

Effortless Beachy Waves


Hello all! I'm Dulce from The Dulce Taylor Blog, and today I'm going to show you guys a quick and easy tutorial on a beach wave hair spray that will give your hair that just-off-the-beach look, not matter where you are! If you're like me, your hair is not straight and perfect. Summer is the time when we want to be doing, well, summery things, not fussing with our hair (do we ever?). Beach waves are the ideal summer look, but unless your hair is naturally and perfectly wavy, those waves can take time to get and may come with a lot of frizz. 

Thankfully, my crafty and beauty-savvy mother helped me come up with this awesome (and inexpensive) hair spray that gives my hair an effortless beach wave look. And it's super easy to make! Here's what you'll need to buy:

1. Epsom salt (look in the pharmacy section at Walmart)
2. Any brand of water-based hair gel
3. Spray bottle (I found this one in the Art section at Hobby Lobby)

You won't use all of the salt or the gel, but you will have some left over to use for extra spray when you run out! All together, this cost me $5.


1. Heat half a cup of water in the microwave for one minute. Then mix 3 teaspoons of Epsom salt and stir until dissolved.


2. Add 3 squirts of hair gel and mix well.


3. Pour into a spray bottle.


Just spray on your damp or dry hair and scrunch with your fingers. If wet, just let you hair air dry for natural, beach-y waves. Enjoy!

To check out more my blog, click here. To see my mother's blog, click here

xoxo,

Dulce
7

Endless Summer


Hi Everyone! 

Welcome to the first week of an amazing summer series! If you're like me, you love everything about summer: the free time, beach days, endless sunshine, vacations, holidays...ahhh amazing! It can be oh so wonderful, but if you don't plan correctly, it goes by quickly, and you'll have nothing fun to look back on. I've teamed up with some fabulous girls to bring you your summer guide to making Summer 2012 your best one yet! We've got everything you need from beauty and fitness tips to fun DIY ideas, and tricks for throwing the perfect summer soiree. 

We're kicking things off with Beach Beauty week beginning tomorrow! So stay tuned for some simple ideas for looking bronzed, beachy and beautiful!

-Candice

7
Back to Top